Nexus7からUSB赤外線リモコンを操る(中編)
「Nexus7からUSB赤外線リモコンを操る(前編)」の続きです。先に前編をみてください。
以前 USB 接続をやった時は PC がホストで Android がデバイスだったけれど今回は Android がホストになるのでやること多いです。
基本的なやり方はいつもの勝手に翻訳さんのサイトを参照しました。
但し、割と内容が薄く書いて無い注意事項が結構あります。
マニフェスト
マニフェストはドキュメント通りです。
AndroidManifest.xml
<?xml version="1.0" encoding="utf-8"?>
<manifest xmlns:android="http://schemas.android.com/apk/res/android"
    package="org.kotemaru.android.irrc" android:versionCode="1" android:versionName="1.0" >
    <uses-sdk android:minSdkVersion="12" />
    <permission android:name="android.hardware.usb.host" ></permission>
    <uses-feature android:name="android.hardware.usb.host" android:required="true" />

    <application
        android:allowBackup="true" android:icon="@drawable/ic_launcher" android:label="@string/app_name" android:theme="@style/AppTheme" >
        <activity
            android:name="org.kotemaru.android.irrc.MainActivity"
            android:configChanges="orientation|screenSize"
            android:label="@string/app_name" >
            <intent-filter>
                <action android:name="android.intent.action.MAIN" />
                <category android:name="android.intent.category.LAUNCHER" />
            </intent-filter>
            <intent-filter>
                <action android:name="android.hardware.usb.action.USB_DEVICE_ATTACHED" />
            </intent-filter>
            <meta-data
                android:name="android.hardware.usb.action.USB_DEVICE_ATTACHED"
                android:resource="@xml/device_filter" />
        </activity>
    </application>
</manifest>
USB_DEVICE_ATTACHED で Activity を起動する設定にすると
既に Activity が起動していても USB_DEVICE_ATTACHED
で Activity が onCreate() から再起動されます。
LAUNCHER からも起動できるようにして有るとちょっとややこしい感じになります。
res/xml/device_filter.xml
<?xml version="1.0" encoding="utf-8"?>
<resources>
    <usb-device vendor-id="8938" product-id="30" />
</resources>
デバイスを特定する情報を記述します。 注意事項は値の記法が10進数なことです。 最初、16進数で書いてはまりました。
USBデバイスの構造
USBデバイスの構造は少し複雑なので整理します。
1つのUSBデバイスは複数のインターフェース(機能)を持ちます。通常は1つです。
各インターフェースは入出力の Endpoint を複数持ちます。通常は1つか2つです。
赤外線リモコンキットは4つのインタフェースを持ち以下のような構造になっていました。
但し、データ通信意外は前編のファームウェアによりダミーになっています。
- UsbDevice : 赤外線リモコンキット
- UsbInterface[0] : キーボード
- UsbEndpoint[0] : IN(INTERRAPT)
- UsbEndpoint[1] : OUT(INTERRAPT)
- UsbInterface[1] : マウス
- UsbEndpoint[0] : IN(INTERRAPT)
- UsbInterface[2] : ボリュームコントローラ
- UsbEndpoint[0] : IN(INTERRAPT)
- UsbInterface[3] : データ通信
- UsbEndpoint[0] : IN(INTERRAPT)
- UsbEndpoint[1] : OUT(INTERRAPT)
- UsbInterface[0] : キーボード
UsbEndpoint のタイプは CONTROL,ISOC,BULK,INTERRAPT の4種類あります。 通常アプリが使用するのは BLUK か INTERRAPT で赤外線リモコンキットは IN/OUT ともに INTERRAPT(非同期) で通信します。
詳細は以下のサイトが詳しいです。
デバイスの認識
起動直後の処理
public static IrrcUsbDriver init(MainActivity activity, String permissionName) {
    IrrcUsbDriver driver = new IrrcUsbDriver(activity, permissionName);
    // USB_DEVICE_ATTACHEDから起動された場合は intent がデバイスを持っている。
    UsbDevice device = activity.getIntent().getParcelableExtra(UsbManager.EXTRA_DEVICE);
    if (device == null) {
        // LAUNCHER からの起動の場合は接続済デバイス一覧から検索する。
        device = findDevice(driver.usbManager, VENDER_ID, PRODUCT_ID);
    }
    /*
     * USB_DEVICE_ATTACHED で起動するように AndroidManifest.xml を記述すると
     * USB_DEVICE_ATTACHED で必ず onCreate() が呼ばれるので Activity から設定した Receiver は呼ばれない。
     * 従って、ここで onAttach() を呼ぶ。
     */
    driver.onAttach(device);
    return driver;
}
USB_DEVICE_ATTACHED から Activity が起動された場合は intent
がデバイスを持っているでそのままデバイス認識の処理に入ります。
LAUNCHER から起動された場合は自前でデバイス一覧から検索します。 それでも見つからない場合の処理はアプリしだいです。
デバイス認識の処理
public String onAttach(UsbDevice device) {
    Log.d(TAG, "onAttach:" + device);
    usbDevice = device;
    if (usbDevice == null) {
        Log.e(TAG, "Not found USB Device.");
        return "Not found USB Device.";
    }
    if (usbManager.hasPermission(usbDevice)) {
        return onStart(usbDevice);
    } else {
        // デバイスの利用許可をユーザに求める。
        // 結果は UsbReceiver.onReceive()にコールバック。
        usbManager.requestPermission(usbDevice, permissionIntent);
    }
    return null;
}
アプリがUSBデバイスを使用するにはユーザの許可が要ります。 許可が無い場合はユーザに許可を求めるリクエストを投げて Receiver で受け取ります。
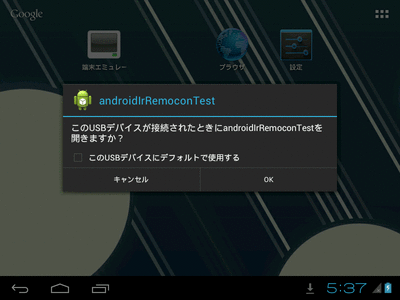
許可があればデバイスとの接続を開始します。
デバイス接続の処理
public String onStart(UsbDevice device) {
    Log.d(TAG, "onStart:" + device);
    if (! device.equals(usbDevice)) {
        return "No device attach.";
    }
    if (! usbManager.hasPermission(usbDevice)) {
        return "No device permission.";
    }

    usbConnection = usbManager.openDevice(usbDevice);
    // TODO:インターフェースの検出は端折ってます。
    UsbInterface usbIf = usbDevice.getInterface(INTERFACE_INDEX);

    // EndPointの検索。分かってる場合は直接取り出しても良い。
    for (int i = 0; i < usbIf.getEndpointCount(); i++) {
        UsbEndpoint ep = usbIf.getEndpoint(i);
        Log.d(TAG, "tye=" + ep.getType());
        if (ep.getType() == UsbConstants.USB_ENDPOINT_XFER_INT) {
            if (ep.getDirection() == UsbConstants.USB_DIR_IN) {
                endpointIn = ep;
            } else if (ep.getDirection() == UsbConstants.USB_DIR_OUT) {
                endpointOut = ep;
            }
        }
    }
    if (endpointIn == null || endpointOut == null) {
        Log.e(TAG, "Device has not IN/OUT Endpoint.");
        return "Device has not IN/OUT Endpoint.";
    }
    // デバイスの確保
    usbConnection.claimInterface(usbIf, true);
    isReady = true;
    return null;
}
この辺りはドキュメント通りです。
Endpoint のタイプは分かっていますがあえてチェックしています。
デバイスの終了処理
public String onDetach(UsbDevice device) {
    Log.d(TAG, "onDetach:" + device);

    if (!device.equals(usbDevice)) {
        Log.d(TAG, "onDetach: Other device.");
        return "Other device";
    }

    if (usbConnection != null) {
        UsbInterface usbIf = usbDevice.getInterface(INTERFACE_INDEX);
        usbConnection.releaseInterface(usbIf);
        usbConnection.close();
    }
    usbConnection = null;
    usbDevice = null;
    isReady = false;
    return null;
}
ここもドキュメント通りです。注意事項はありません。
レシーバ
レシーバの登録
public static UsbReceiver init(MainActivity activity, Driver driver, String permissionName) {
    UsbReceiver receiver = new UsbReceiver(activity, driver, permissionName);
    IntentFilter filter = new IntentFilter();
    filter.addAction(permissionName);  // USBデバイスの利用許可の通知を受ける。
    filter.addAction(UsbManager.ACTION_USB_DEVICE_DETACHED);
    activity.registerReceiver(receiver, filter);
    return receiver;
}
デバイスの利用許可とDETACHEDを受け取ります。
レシーバの処理
@Override
public void onReceive(Context context, Intent intent) {
    String action = intent.getAction();
    Log.d(TAG,"onReceive:"+action);
    UsbDevice device = (UsbDevice)intent.getParcelableExtra(UsbManager.EXTRA_DEVICE);
    if (permissionName.equals(action)) {
        String errorMeg = driver.onStart(device);
        if (errorMeg != null) {
            activity.errorDialog(errorMeg);
        }
    } else if (UsbManager.ACTION_USB_DEVICE_DETACHED.equals(action)) {
        if (driver.onDetach(device) == null) {
            activity.finish();
        }
    }
}
デバイス使用許可が来たらデバイスの接続開始処理を呼びます。
DETACHED で Activity を終わらせていますがアプリの仕様しだいです。
データの送受信
USB_ENDPOINT_XFER_INT(非同期) の通信は UI スレッドでは行えません。
必ず、AsyncTask か Thread で行います。
非同期パケット送信
    private void doRequest(byte[] buff) throws IOException {
        Log.d(TAG, "request:" + dump(buff));

        ByteBuffer buffer = ByteBuffer.allocate(buff.length);
        UsbRequest request = new UsbRequest();
        buffer.put(buff);

        request.initialize(usbConnection, endpointOut);
        request.queue(buffer, buff.length);

        UsbRequest finishReq;
        while ((finishReq = usbConnection.requestWait()) != request) {
            if (finishReq == null) throw new IOException("Request failed.");
            sleep(100);
        }
    }
非同期パケット送信の方法はこれでほぼ定形だと思います。
requestWait() の戻り値は同時に走っている他の UsbRequest の場合もあるのでループでチェックします。 null は何らかのエラーが有ったとき返るようです。
非同期パケット受信
    private byte[] doResponse() throws IOException {
        ByteBuffer buffer = ByteBuffer.allocate(endpointIn.getMaxPacketSize());
        buffer.clear();
        UsbRequest request = new UsbRequest();
        request.initialize(usbConnection, endpointIn);
        request.queue(buffer, endpointIn.getMaxPacketSize());

        UsbRequest finishReq;
        while ((finishReq = usbConnection.requestWait()) != request) {
            if (finishReq == null) throw new IOException("Request failed.");
            sleep(100);
        }

        // Note: OSバージョンにより flip() の必要性が異なる気がする...
        if (buffer.remaining() == 0) buffer.flip();

        byte[] buff = new byte[buffer.remaining()];
        buffer.get(buff);
        Log.d(TAG, "response:" + dump(buff));
        return buff;
    }
非同期パケット受信もこれでほぼ定形だと思います。
謎なのは エミュレータ(4.0.4) では buffer.flip() は必要無かったのですが Nexus7(4.4.2) では必要になりました。 赤外線リモコンキットはパケットが固定長なのでこのコードで どちらも動作しますがデバイスによっては OSバージョンのチェックが必要かもしれません。
感想
通信できるようになるまで作法と言うか手順が多いですね。
通信自体も非同期だと一手間かかります。
Android の USBホスト実装は基本的にこの形に乗りそうです。
ソース全体は以下のSVNを参照して下さい。
いよいよリモコンを操ります。
「Nexus7からUSB赤外線リモコンを操る(後編)」に続きます。